


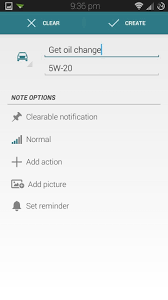
How to Setting of Notification Reminder in Samsung Galaxy S5

Samsung Galaxy S5 has some features that have been designed to help you
easily know that you have unread notifications so that you won't miss
any of them, one of those features is the notification reminder feature.
If you enable this feature, your phone will alert you with the default
notification sound at the specified interval to remind you of any unread
notifications, in other words, the phone will keep playing the sound at
the specified interval until you read or open that unread notification.


How to set the notification reminder feature?
In this post, we'll try enabling and setting the notification reminder feature with two different methods: from the settings menu and from the direct access menu.
Method #1: From the settings menu
You can enable and set the notification reminder feature from the general settings menu by using the following steps:
Method #2: From the direct access option
This method can be used if you have enabled the accessibility menu within the direct access feature. See the following steps to enable and set the notification reminder feature from the direct access option:
How to set the notification reminder feature?
In this post, we'll try enabling and setting the notification reminder feature with two different methods: from the settings menu and from the direct access menu.
Method #1: From the settings menu
You can enable and set the notification reminder feature from the general settings menu by using the following steps:
- On any screen, swipe down the top of the screen to open up the notification panel and then tap
 to go to the settings menu.
 - With the settings menu is displayed in grid view, scroll down to the Personalisation section and then tap Accessibility
 .
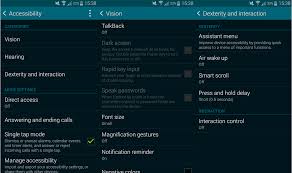
. - Tap Vision.
- Tap Notification reminder.
- Slide the ON/OFF switch to the right to enable the notification reminder.
- If needed, you can adjust an interval between alerts by tapping Reminder interval and then select the required interval from the following options:
- 3 minutes
- 5 minutes
- 10 minutes
- 30 minutes
- 1 hour
- Now, when you have an unread notification, the default notification sound will be played at the specified interval until the unread notification is opened.
Method #2: From the direct access option
This method can be used if you have enabled the accessibility menu within the direct access feature. See the following steps to enable and set the notification reminder feature from the direct access option:
- On any screen, press the Home key three times quickly to display the direct access option.
- Tap Accessibility.
- Tap Vision.
- Tap Notification reminder.
- Slide the ON/OFF switch to the right to enable the notification reminder.
- If needed, you can adjust an interval between alerts by tapping Reminder interval and then select the required interval from the following options:
- 3 minutes
- 5 minutes
- 10 minutes
- 30 minutes
- 1 hour
- Now, when you have an unread notification, the default notification sound will be played at the specified interval until the unread notification is opened.
Samsung Galaxy S5: How to Enable and Use Smart Scroll in android 4.4.2 Kitkat
Smart scroll is one of the smart features that you can find in Samsung Galaxy
S5. When this feature is enabled, you can scroll pages while browsing a
webpage or reading an email message simply by tilting your head or the
device. This feature works by utilizing the front camera to detect your
face and act on that information to automatically scroll the pages up or
down.
How to Enable or disable the smart scroll feature?
You can turn on or off the smart scroll feature by using the following steps:
How to use the smart scroll feature?
Before using the smart scroll feature, you have to make sure that the following conditions are fulfilled so that this feature will work well:
Assuming that you have enabled the smart scroll feature and the conditions above are fulfilled, then you can use the smart scroll feature to scroll pages in the Internet app and the stock Email app. As the example, we'll try using the smart scroll while browsing a webpage in Internet app:
If you have ever used this feature in the older Samsung Galaxy S series, you will probably notice that the smart scroll feature in Samsung Galaxy S5 has been improved because this feature now has a better face recognition. But, you have to remember that since this feature needs a lot of power to run, then use this feature to scroll pages for a long time will drain your battery quickly.
How to Enable or disable the smart scroll feature?
You can turn on or off the smart scroll feature by using the following steps:
- On any screen, swipe down the top of the screen to open up the notification panel and then tap
 to go to the settings menu.
 - With the settings menu is displayed in grid view, scroll down to the Personalisation section and then tap Accessibility
 .
. - Tap Dexterity and interaction.
- Tap Smart scroll. If Smart scroll is off, tap the ON/OFF switch to turn it on.
- Under the Scroll by section, you'll be presented with the following options:
- Tilting head: select this option if you want to be able to scroll pages by tilting your head backwards or forwards.
- Tilting device: select this option if you want to be able to scroll pages by tilting the device backwards or forwards.
- Under the General section, you'll be presented with two options that can be used to customized the smart scroll feature. They are:
- Speed: use this option to adjust the speed of scrolling pages while using the smart scroll feature.
- Visual feedback display: enable this option if you want the device displaying a signal icon when your action is recognized.
How to use the smart scroll feature?
Before using the smart scroll feature, you have to make sure that the following conditions are fulfilled so that this feature will work well:
- The device is held steady and upright
- The device is in a well-lit environment so that it'll get enough light to be used by the front camera to detect your face.
- The screen is not in direct light so that the front camera can easily detect your face.
- The front camera is not being used by other apps.
- The Multi window feature is not being enabled.
- When you use this feature in Internet app, make sure the webpage is not being displayed in the reader mode.
Assuming that you have enabled the smart scroll feature and the conditions above are fulfilled, then you can use the smart scroll feature to scroll pages in the Internet app and the stock Email app. As the example, we'll try using the smart scroll while browsing a webpage in Internet app:
- Open Internet app.
- Open a webpage by entering the URL in the address bar and then tap Go.
- Wait until the webpage is fully loaded and you'll see the smart scroll icon
 is displayed on the status bar.
 - If you enable the smart scroll feature by tilting head:
- Look at the screen until this icon
 is displayed in the middle of the screen as a sign that your face has been recognized.
 - Tilting your head backwards to scroll up the webpage.
- Tilting your head forwards to scroll down the webpage.
- If you enable the smart scroll by tilting the device:
- Look at the screen until this icon
 is displayed in the middle of the screen as a sign that your face has been recognized.
 - Tilting the device forwards to scroll up the webpage.
- Tilting the device backwards to scroll down the webpage.
If you have ever used this feature in the older Samsung Galaxy S series, you will probably notice that the smart scroll feature in Samsung Galaxy S5 has been improved because this feature now has a better face recognition. But, you have to remember that since this feature needs a lot of power to run, then use this feature to scroll pages for a long time will drain your battery quickly.
Letting and Configure Color Adjustment in Android 4.4.2 Kitkat
Samsung Galaxy S5 provides the users with various useful features, one
of which is the color adjustment feature. This feature is designed for
those of users who have difficulty to distinguish the colour or have
difficulty to read the display because its colours. By enabling this
feature, you will be asked to complete the initial color adjustment
process and the phone will use the result to determine whether the
colours of the display need to be adjusted or not.
How to enable and configure colour adjustment?
To get the best result, do the initial color adjustment process in an environment with normal indoor lighting so that you can distinguish the color well. You can enable and configure color adjustment by using the following steps:
FYI, I myself have enabled the colour adjustment feature and did the initial colour adjustment process. As the result, my phone told me that the color didn't need to be adjusted. So, how about you? Have you enabled and configured this feature? Did the colours on your phone need to be adjusted?
How to enable and configure colour adjustment?
To get the best result, do the initial color adjustment process in an environment with normal indoor lighting so that you can distinguish the color well. You can enable and configure color adjustment by using the following steps:
- On any screen, swipe down the top of the screen to open up the notification panel.
- Tap
 to go to the settings menu.
 - With the settings menu is displayed in grid view, scroll down to the Personalization section and then tap Accessibility
 .
. - Tap Vision.
- Scroll down to find Color adjustment and then tap it.
- Slide the ON/OFF switch to the right to enable color adjustment.
- Tap Start button.
- Arrange the provided color tiles in order of similarity, starting from the fixed color on the bottom panel. Tap the color that is most similar with the previous one. If you have mistakenly selected the colours, you can re-arrange the colours that have been placed on the bottom panel by dragging and dropping them.
- Tap Done button. FYI, if you can distinguish the colours well, then the phone won't adjust the colours.
- If you can't distinguish the colours, tap Camera or Image.
- Slide the color adjustment bar to the left or to the right to fine-tune the color.
- Tap Done button.
- The colours have been adjusted and changed into more recognizable colours.
- For any reason, if you want to readjust the colours and start a new initial color adjustment process, long tap the Recent apps key
 or tap
  to open up the additional options and then tap Readjust colour.
FYI, I myself have enabled the colour adjustment feature and did the initial colour adjustment process. As the result, my phone told me that the color didn't need to be adjusted. So, how about you? Have you enabled and configured this feature? Did the colours on your phone need to be adjusted?
Allowing and Use Magnification Gestures in Samsung Galaxy S5
If you explore the accessibility menu in your Samsung Galaxy S5, you'll
notice that this menu contains with various features, one of which is
the magnification gestures feature. By enabling this feature, you can
easily magnify the screen and zoom in on a specific area.
How to enable or disable magnification gestures?
Generally, you can find the magnification gestures option and then turn it on or off by using two methods available, through the direct access option or the settings menu.
Method #1: From the direct access option
You can quickly enable or disable the magnification gestures feature by using the following steps if you have enabled the direct access feature and added accessibility menu to the direct access option:
Method #2: From the settings menu
How to use magnification gestures?
When this feature is enabled, you can use it as described in the following steps:
Please note that this feature can't work along with air view and one-handed operation, thus both these features will be automatically turned off when you enable the magnification gestures feature. The magnification gestures feature can be used on any screen or app except the keyboard. But, you may notice that while this feature is enabled, the keyboard can't be displayed in floating view and the response time in some apps could be slowed down.
How to enable or disable magnification gestures?
Generally, you can find the magnification gestures option and then turn it on or off by using two methods available, through the direct access option or the settings menu.
Method #1: From the direct access option
You can quickly enable or disable the magnification gestures feature by using the following steps if you have enabled the direct access feature and added accessibility menu to the direct access option:
- On any screen, press the Home key three times quickly to open up the direct access option.
- On pop up menu select Accessibility.
- Tap Vision.
- Tap Magnification gestures.
- Depending on your current settings, tap the ON/OFF switch located at the top right corner of the screen to enable or disable the magnification gestures feature. When the switch is on the right side or shows green means the magnification gestures feature is enabled.
Method #2: From the settings menu
- On any screen, swipe down the top of the screen to open up the notification panel.
- Tap
 to go to the settings menu.
 - With the settings menu is displayed in grid view, scroll down to the Personalization section and then tap Accessibility
 .
. - Tap Vision.
- Tap Magnification gestures.
- Depending on your current settings, tap the ON/OFF switch located at the top right corner of the screen to enable or disable the magnification gestures feature. When the switch is on the right side or shows green means the magnification gestures feature is enabled.
How to use magnification gestures?
When this feature is enabled, you can use it as described in the following steps:
- On any screen, triple tap the screen to zoom in. While the screen is zoomed in, you can do the following actions:
- You can pan or explore different part of the screen by dragging two or more fingers across the screen.
- You can increase the zoom level by spreading two fingers apart together on the screen.
- You can decrease the zoom level by pinching two fingers together on the screen.
- Triple tap the screen again to zoom out and return to the previous state.
- You can also temporarily zoom in the screen by triple tapping the screen and holding your finger on the screen. Without lifting your finger from the screen, you can do the following actions:
- You can explore different part of the screen by dragging your finger.
- Lift your finger from the screen to zoom out the screen and return to the previous state.
Please note that this feature can't work along with air view and one-handed operation, thus both these features will be automatically turned off when you enable the magnification gestures feature. The magnification gestures feature can be used on any screen or app except the keyboard. But, you may notice that while this feature is enabled, the keyboard can't be displayed in floating view and the response time in some apps could be slowed down.
Qualifying and Use Direct Access in Samsung Galaxy S5
As we all know that Samsung often places various features in the
accessibility menu. That's why for most of users, the accessibility menu
becomes one of the frequently accessed menus because they often need to
access this menu to enable, configure or disable certain feature.
Instead of accessing this menu through the settings menu which will
little bit longer, you can shorten it by activating the direct access
feature. This feature will allow you directly access the accessibility
features that you frequently use simply by triple pressing the Home key
quickly.
How to enable direct access?
You can enable this feature by using the following steps:
Assuming that you have enabled the direct access feature and added all menus to the direct access option, then you can use the following steps to access them quickly:
For me, enabling the direct access feature is really helpful because I often need to access the accessibility menu. By using this feature, now I can save more time because I can open the accessibility menu directly from any screen simply by triple tapping the Home key quickly.
How to enable direct access?
You can enable this feature by using the following steps:
- Swipe down the top of the screen to open up the notifications panel.
- Tap
 to go to the settings menu.
 - With the settings menu is displayed in grid view, scroll down to the Personalization section and then tap Accessibility
 .
. - Tap Direct access.
- Slide the ON/OFF switch located at the top right corner of the screen to the right to enable direct access.
- In the Accessibility setting section, you can select from the following menus you want to add to the direct access option:
- Accessibility
- Talkback
- Negative colours
- Interaction control. FYI, this option will be available if you have enabled the interaction control feature in the accessibility menu. We'll learn further more about it in other post.
Assuming that you have enabled the direct access feature and added all menus to the direct access option, then you can use the following steps to access them quickly:
- On any screen, press the Home key three times quickly to open up the direct access option.
- If you tap Accessibility, then the accessibility menu will be opened.
- If you tap Talkback, then the talkback feature will be turned on or turned off depending on your current settings.
- If you tap Negative colours, then the negative colours will be applied or removed depending on your current settings.
- If you tap Interaction control, then you'll be asked to configure interaction control or this feature will be turned off depending on your current settings.
For me, enabling the direct access feature is really helpful because I often need to access the accessibility menu. By using this feature, now I can save more time because I can open the accessibility menu directly from any screen simply by triple tapping the Home key quickly.
Samsung Galaxy S4: How to Enable and Setup Colour Adjustment in Android 4.4 Kitkat
Seems the Samsung Galaxy SIV is designed to be used by everyone, even
those of users who have the special needs. That's why no wonder if this
device has been equipped with the accessibility menu contains with some
useful features to help improving those special users' accessibility.
One of the useful features in the accessibility menu
is the colour adjustment. This option is designed to help improving
accessibility for the user who are colour blind or have difficulty to
read the content because the colors. When you enable this option, you'll
be presented with some random colour samples and you have to sort them
based on their similarities. Once done, your phone will use the result
to determine whether the display colour should be adjusted or not.

How to enable and setup the color adjustment?
Below are the steps to do so:
As a note, to get the best result, do the initial colour adjustment process in an environment with normal indoor lighting. FYI, I've tried this option and the result is that I don't need to adjust the display colour. So, how about you? Have you tried this option?
How to enable and setup the color adjustment?
Below are the steps to do so:
- In any screen, swipe down the top of the screen to open the notifications panel and then tap the Settings icon
 .
. - Tap My device tab.
- Scroll down to find Accessibility, then tap it.
- Scroll down to find Colour adjustment and then slide the ON/OFF switch next to this option to the right to enable it. The switch turns green when the option is enabled.
- Tap Colour adjustment.
- Tap Start button to start the initial colour adjustment process.
- You'll be given some random colour samples and you have to sort them in order of similarity, starting from the fixed color given on the bottom panel and then you have to select the colour samples that is most similar with the previous one.
- You can drag and drop colours on the bottom panel to rearrange them.
- Tap Done button.
- If the device determines that you're not colour blind or having difficulty to read the display then the device will tell you that the colour adjustment is not necessary to do, while if the device determines that you're colour blind or having difficulty to read the display then you'll be asked to find-tune by tapping the Camera or Image button and then adjust the color by sliding the colour adjustment bar to the right or to the left until you find the best one, and then tap Done button.
- The colour adjustment will be applied to the device display.
- If you want to reset and start the new initial colour adjustment process, tap the Menu key and then select Readjust colour. Tap OK button and the colour adjustment setting will be reset.
As a note, to get the best result, do the initial colour adjustment process in an environment with normal indoor lighting. FYI, I've tried this option and the result is that I don't need to adjust the display colour. So, how about you? Have you tried this option?
How to Enable and Use Interaction Control in Samsung Galaxy S4
Interaction control is a new feature that has been brought by Android
4.4 Kitkat. You can find this feature under the accessibility menu.
Turning on this feature will allow you to enable or disable
all-enabled-motions and screen timeout as well as allow you to block
certain or all areas of the screen from touch interaction in the
currently opened app. While you're using this feature, all physical
buttons (Home, Menu, Back, Volume and Power button), auto rotate and
touch interaction in the notifications panel will be disabled.


How to enable or disable interaction control?
Generally, there are 2 methods available that you can use to enable or disable this feature, from the Settings menu and from the device option.
Method #1: From the Settings menu
Method #2: From the device options
You can use this method if you have added the accessibility shortcut to the device option. If you don't know how to do so, you can see the complete steps here. To enable or disable interaction control through the device menu, do as follows:
How to use interaction control?
Once the interaction control is activated, then you can use this feature in the app that is currently open. As the example, I'll use this feature in the Kids Preschool Puzzle Lite app (this is my son's favourite game):
I personally often use this feature when my 4-years-old son use my phone to play a game. This feature helps me to prevent him touching certain area in the screen and prevent him exiting the game accidentally and then using my phone for unwanted activities (e.g: make a call, send a message, etc). So, how about you? Have you tried this feature?
How to enable or disable interaction control?
Generally, there are 2 methods available that you can use to enable or disable this feature, from the Settings menu and from the device option.
Method #1: From the Settings menu
- In any screen, swipe down the top of the screen to open the notifications panel and then tap the Settings icon
 to go to the settings menu.
 - Tap My device tab.
- Scroll down to find Accessibility, then tap it.
- Scroll to the very bottom to find Interaction control, then tap the ON/OFF switch to enable or disable this option. When the switch is on the right side or shows green means the option is enabled.
Method #2: From the device options
You can use this method if you have added the accessibility shortcut to the device option. If you don't know how to do so, you can see the complete steps here. To enable or disable interaction control through the device menu, do as follows:
- In any screen, long press the Power key.
- On pop up menu select Accessibility.
- Scroll to the very bottom to find Interaction control, then tap the ON/OFF switch to enable or disable this option. When the switch is on the right side or shows green means the option is enabled.
How to use interaction control?
Once the interaction control is activated, then you can use this feature in the app that is currently open. As the example, I'll use this feature in the Kids Preschool Puzzle Lite app (this is my son's favourite game):
- In the Kids Preschool app or other app that is currently open, press the Home key and the Volume down key simultaneously to use and change the setting of the interaction control in this app.
- In the interaction screen, outline a part of the screen to block from touch interaction and then adjust the blue frame to adjust the blocked areas or mark the checkbox in the left side of the Block whole screen option to block the whole screen.
- Tap Next button.
- Here you'll see two options available, they are:
- Screen timeout: enable this option to lock the device automatically after your set time. Disable this option will make your phone never locks the device. If you enable this option, you still can use the Power key to wake up the screen.
- Motions: enable this option to allow you using all motions you've enabled under the motions and gestures menu in unblocked screen. Disable this option will prevent you to use all enabled motions while this feature is used.
- Tap Done button.
- You'll see the blue frame is displayed as a sign that the area is blocked. If you didn't block the whole screen, you still can do touch interaction in the unblocked screen.
- To exit from this mode, tap the Home key and the Volume down key simultaneously.
I personally often use this feature when my 4-years-old son use my phone to play a game. This feature helps me to prevent him touching certain area in the screen and prevent him exiting the game accidentally and then using my phone for unwanted activities (e.g: make a call, send a message, etc). So, how about you? Have you tried this feature?
How to Adding or Removal of Accessibility Shortcut to the Device Menu
There are several option that we can find under accessibility menu in
Samsung Galaxy SIII. One of which is an option called Talkback. Enabling
this option will set the phone to provide you a spoken feedback for
whatever you do with the phone. With the Android Jelly Bean, enable
Talkback mode and face detection shot mode will allow you to use easy
snap feature when taking a picture.
Usually, you can accessing the accessibility menu through the settings menu. But, you can add the accessibility shortcut under device option for faster access. You can do so by enabling Accessibility shortcut option.
How to enable or disable accessibility shortcut?
Below are the complete steps to do so:
By knowing this step, now you can set to add or not accessibility shortcut under device power menu. For some users, adding this shortcut will help them to access the accessibility menu more faster and easier, while for some others are not. So, hope this helps :)
Usually, you can accessing the accessibility menu through the settings menu. But, you can add the accessibility shortcut under device option for faster access. You can do so by enabling Accessibility shortcut option.
How to enable or disable accessibility shortcut?
Below are the complete steps to do so:
- Go to Settings.
- Tap Accessibility.
- Depending on your current settings, tap Accessibility shortcut to enable or disable this option. When the box next to the option is checked means the option is turned on.
- Once you've enabled this option, you'll see an accessibility shortcut whenever you press and hold the Power key to open device options.
By knowing this step, now you can set to add or not accessibility shortcut under device power menu. For some users, adding this shortcut will help them to access the accessibility menu more faster and easier, while for some others are not. So, hope this helps :)
Fine-tune Sound Balance in Samsung Galaxy S3

As we all know that the Samsung Galaxy SIII support with the stereo and
mono audio. That's why you can use two earphones when in a stereo audio
and use one earphone when in a mono audio. To switch between stereo and
mono audio, you can head to the accessibility settings then switch
between both of them by using mono audio option.
In the same screen you can also find an option named sound balance which will allow you to adjust the sound balance to get the best balance between the left and right audio. This of course will expand your experience while using this phone to listen to the music or other sounds.
How to customize sound balance?
Below are the steps you need to do:
By knowing the steps to adjust balance while you're in the stereo audio, now you can customize it according to your hearing, preferences and the sound sources. So, hope this helps :)
In the same screen you can also find an option named sound balance which will allow you to adjust the sound balance to get the best balance between the left and right audio. This of course will expand your experience while using this phone to listen to the music or other sounds.
How to customize sound balance?
Below are the steps you need to do:
- Go to Settings.
- Tap Accessibility.
- Scroll down to the Hearing section, then tap Sound Balance.
- To adjust balance between left and right audio, slide the bar to the left or to the right.
- Tap OK button to save the changes.
By knowing the steps to adjust balance while you're in the stereo audio, now you can customize it according to your hearing, preferences and the sound sources. So, hope this helps :)
Completely Disabling of Talk Back Mode in Samsung Galaxy S3
Talk back mode is an option inside Samsung Galaxy SIII designed for
vision-impaired or low vision people to make them more easier when using
this phone. You can easily enable this option on your phone. Once this
option is turned on, then the phone will give a spoken feedback for
anything the user do with this phone.

In other side of this option's advantages, there are lot of users said that they were stuck with this mode and have difficulty to get out from this mode. The main reason of this situation is because this mode will change the way user interact with the phone and they not realize that while in this mode they need to use two finger instead one finger and use double tap instead a single tap.
How to turn off talk back mode?
Here's how to do to disable this mode:
In certain conditions, the talk back is still operating even when you already turned off the option. The possible reason for it is that you have Google Text To Speech (Google TTS) and/or Samsung TTS and you need to disable them in order to completely disable talk back mode on your phone.
How to disable Google Text To Speech and Samsung TTS?
Here are the complete steps to do:
By disabling talk back option under accessibility settings and disable Google TTS and/or Samsung TTS, now your phone will completely get out from the talk back mode and you will be able to use the phone as you used to be.
In other side of this option's advantages, there are lot of users said that they were stuck with this mode and have difficulty to get out from this mode. The main reason of this situation is because this mode will change the way user interact with the phone and they not realize that while in this mode they need to use two finger instead one finger and use double tap instead a single tap.
How to turn off talk back mode?
Here's how to do to disable this mode:
- From your Home screen, double tap Apps.
- Double tap Settings.
- Scroll down using two fingers to Accessibility, then double tap it.
- Double tap Talk Back.
- Slide the slider to the left using two fingers, then double tap OK button to disable talk back mode.
In certain conditions, the talk back is still operating even when you already turned off the option. The possible reason for it is that you have Google Text To Speech (Google TTS) and/or Samsung TTS and you need to disable them in order to completely disable talk back mode on your phone.
How to disable Google Text To Speech and Samsung TTS?
Here are the complete steps to do:
- Go to Settings.
- Tap Application manager.
- Tap Running tab.
- Tap All tab.
- From here, disable Google Text to Speech Engine and also disable Samsung TTS.
- Tap Home button to return to the standby mode.
By disabling talk back option under accessibility settings and disable Google TTS and/or Samsung TTS, now your phone will completely get out from the talk back mode and you will be able to use the phone as you used to be.
Supporting of Talk Back Mode in Samsung Galaxy S3
In the past articles, we all already have learned about some modes
available in Samsung Galaxy SIII which will allow you to stay using this
phone in certain conditions, such as driving mode that will facilitate
you using the phone while you're driving.
Another mode that you can find inside this phone is talk back mode. Basically, this mode is designed to facilitate the people with vision-impaired or low vision to make them more easier using the phone. By enabling this option, the phone will provides spoken feedback to help the user, such as the phone will describe what the user touch, select and activate.
How to turn on talk back mode?
If you want to activate this option, then kindly do as follows:
Once you've activated this mode, the phone will give a spoken feedback on whatever you do with the phone. For the record, enabling this feature will change the way you interact with the phone. In this mode, you need to use two finger instead one finger to scroll the phone and use double tap instead single tap to select the menu, app or option. Using this mode also will disable some features on your phone, such as you will no longer be able to take a screen shot or open the notification.
Another mode that you can find inside this phone is talk back mode. Basically, this mode is designed to facilitate the people with vision-impaired or low vision to make them more easier using the phone. By enabling this option, the phone will provides spoken feedback to help the user, such as the phone will describe what the user touch, select and activate.
How to turn on talk back mode?
If you want to activate this option, then kindly do as follows:
- Go to Settings.
- Scroll to Accessibility, then tap it.
- Scroll to Talk back, then tap it.
- Slide the slider to the right then tap OK button to enable talk back mode.
- Finish. Now you have managed to turn on talk back mode.
Once you've activated this mode, the phone will give a spoken feedback on whatever you do with the phone. For the record, enabling this feature will change the way you interact with the phone. In this mode, you need to use two finger instead one finger to scroll the phone and use double tap instead single tap to select the menu, app or option. Using this mode also will disable some features on your phone, such as you will no longer be able to take a screen shot or open the notification.
Enabling or Disabling Negative Colours in Samsung Galaxy S3

You can also find an option under accessibility settings which has the similar function with inverted rendering in the browser apps, this option called Negative colours. When you turn on this option, then the screen display will inverse to the negative color.
How to turn on or off negative colours?
If you want to customize this option or want to fix the negative screen issue caused by an accidentally enabling this option, then kindly follow the steps listed below:
- Go to Apps through Home screen.
- Scroll to Settings, then tap on it.
- Scroll to Accessibility, then tap on it.
- Scroll down to the Vision section. Depending on your current settings tap Negative colours option to enable or disable this option. When the checkbox next to this option is ticked means the phone will reverse the colours of the screen.
- Tap Home button to return to the standby mode.
Some users reported that they were accidentally enabling this option resulting their screen color looks like a negative film, so if you encountered the same problem with them, now you can fix the problem using the steps mentioned above. So, hope this helps :)


0 comments:
Post a Comment