


Supporting and Use Magnifier Window Feature in Samsung Galaxy S6 Edge

Magnifier window is one of accessibility features in Samsung Galaxy S6
Edge which is basically designed to aid limited or low vision users
having difficulties seeing or reading what's on the screen. When this
feature is enabled, you'll be provided with a magnifier window that you
can use to magnify a specific area on the screen so you can see it
better.
How to enable the magnifier window feature?
You can turn on this feature by using two different methods: from the settings menu and from the direct access.
Method #1: From the settings menu
You can use the following steps if you'd like to enable the magnifier window and adjust its settings:
Method #2: From the direct access menu
If you have enabled the direct access feature, you can use the following steps to quickly enable the magnifier window feature:
How to use the magnifier window feature?
When the magnifier window is displayed on the screen, you can drag it to a specific area on the screen and magnify what's under the window to help you see it better. When you're done, tap to close the window and disable the magnifier window feature as well.
How to enable the magnifier window feature?
You can turn on this feature by using two different methods: from the settings menu and from the direct access.
Method #1: From the settings menu
You can use the following steps if you'd like to enable the magnifier window and adjust its settings:
- On any screen, swipe down the top of the screen to open up the notification panel and then tap
 at the top right to go to the settings menu.
 - Scroll down to the Personal section and then tap Accessibility.
- Tap Vision.
- Scroll down the screen and then tap Magnifier window.
- Slide the ON/OFF switch to the right to enable the magnifier window
feature. When this feature is enabled, the switch turns green and the
magnifier window appears on the screen.
- If needed, you can adjust the zoom percentage of the magnifier window. Tap
 to decrease the zoom level or tap
  to increase the zoom level.
- If needed, you can also adjust the magnifier window size by tapping Magnifier size and then select Small, Medium or Large.
Method #2: From the direct access menu
If you have enabled the direct access feature, you can use the following steps to quickly enable the magnifier window feature:
- On any screen, press the Home key three times quickly to open up the direct access menu.
- In the direct access menu, tap Magnifier window.
- The magnifier window feature is enabled and the magnifier window appears on the screen.
How to use the magnifier window feature?
When the magnifier window is displayed on the screen, you can drag it to a specific area on the screen and magnify what's under the window to help you see it better. When you're done, tap
Samsung Galaxy S6 Edge: How to Enable and Use Magnification Gestures Feature in Android 5.1.1 Lollipop
Magnification gestures is a feature in Samsung Galaxy S6 Edge that is
basically designed for the visually impaired or low vision users in
order to help them easily see a small thing or part in their phones'
screen. When this feature is enabled, you can easily magnify what's on
your screen by triple tapping the screen. But, you have to remember that
when this feature is enabled, the response time could be slowdown,
especially when using the dial pad, calculator and keyboard.
How to enable magnification gestures feature?
As the example, we'll enable this feature by using two different methods: from the settings menu and from the direct access menu
Method #1: From the settings menu
You can turn on magnification gestures feature via the settings menu by using the following steps:
- While the screen is unlocked, swipe down the top of the screen to open up the notification panel and then tap
 at the top right to go to the settings menu.
 - Scroll down to the Personal section and then tap Accessibility.
- Tap Vision.
- Scroll down the screen and then tap Magnification gestures.
- Slide the ON/OFF switch to the right to enable magnification gestures feature. The switch turns green when it's enabled.
Method #2: From the direct access
If you have enabled the direct access feature, you can turn on magnification gestures feature from the direct access menu by using the following steps:
- On any screen, press the Home key three times quickly to open up the direct access menu.
- In the direct access menu, tap Accessibility.
- Tap Vision.
- Scroll down the screen and then tap Magnification gestures.
- Slide the ON/OFF switch to the right to enable magnification gestures feature. The switch turns green when it's enabled.
How to use magnification gestures feature?
See the following steps as the example of using this feature:
- To use magnification mode, triple tap anywhere on the screen with one finger(except the keyboard and navigation bar). While the screen is zoomed in, you can do the following actions:
- Drag two or more fingers across the screen to pan or explore different part of the screen.
- Spread two fingers apart together on the screen to increase the zoom level.
- Pinch two fingers together on the screen to decrease the zoom level.
- Triple tap the screen to return to the normal state.
- To temporarily magnify what's under your finger, triple tap the screen and hold your finger on the screen. Without lifting your finger from the screen, you can do the following actions:
- Drag your finger to pan or explore different part of the screen.
- Lift your finger from the screen to return to the normal state.
How to Enable and Use Single Tap Mode in Android 5.1.1

By default, you have to swipe the on-screen icon if you want to
answer/reject calls or dismiss alarm/timer/S Planner event. However, you
can simplify the way you do those things by enabling the single tap
mode so you just need to single tap the on-screen icon instead of
swiping it.
How to enable single tap mode?
You can turn this feature on by using two different methods: from the settings menu and from the direct access menu(it can be used if you have enabled the direct access feature).
Method #1: From the settings menu
Method #2: From the direct access menu
How to use single tap mode?
When this feature is enabled, you can use it to easily answer/reject calls or dismiss alarm/timer/S Planner event.
Answer or reject call
When an incoming call arrives, single tap to answer the call or single tap
  to reject the call.
Dismiss alarm, timer and S Planner event(when the screen is off or locked)
When an alarm goes off or the time of a timer is up or an S Planner event reminder sounds, single tap to dismiss it.
How to enable single tap mode?
You can turn this feature on by using two different methods: from the settings menu and from the direct access menu(it can be used if you have enabled the direct access feature).
Method #1: From the settings menu
- While the screen is unlocked, swipe down the top of the screen to open up the notification panel and then tap
 at the top right to go to the settings menu.
 - Scroll down to the Personal section and then tap Accessibility.
- If needed, scroll down the screen and then slide the ON/OFF switch next to Single tap mode to the right to enable it. The switch turns green as a sign that the single tap mode is enabled.
Method #2: From the direct access menu
- While the screen is unlocked, press the Home key three times quickly to open up the direct access menu.
- Tap Accessibility.
- If needed, scroll down the screen and then slide the ON/OFF switch next to Single tap mode to the right to enable it. The switch turns green as a sign that the single tap mode is enabled.
How to use single tap mode?
When this feature is enabled, you can use it to easily answer/reject calls or dismiss alarm/timer/S Planner event.
Answer or reject call
When an incoming call arrives, single tap
Dismiss alarm, timer and S Planner event(when the screen is off or locked)
When an alarm goes off or the time of a timer is up or an S Planner event reminder sounds, single tap
Samsung Galaxy S6 Edge: How to Enable and Use Direct Access in Android 5.1.1 Lollipop
Samsung Galaxy S6 Edge
comes with various accessibility features to help those with visual,
hearing and/or dexterity impairments use this phone with more easily.
For easier access to some accessibility options, you can enable the direct
access feature so you can directly access to the selected accessibility
options from any screen simply by pressing the Home key three times
quickly
How to enable the direct access feature?
You can turn this feature on by using the following steps:
How to use the direct access feature?
As the example, if you'd like to enable the grayscale mode, you can easily do so by pressing the Home key three times quickly to open up the direct access menu and then tap Grayscale. The color of your phone's screen will be changed to grayscale.
How to enable the direct access feature?
You can turn this feature on by using the following steps:
- While the screen is unlocked, swipe down the top of the screen to open up the notification and then tap
 at the top right to go to the settings menu.
 - Scroll down the screen to the Personal section and then tap Accessibility.
- Tap Direct access.
- Slide the ON/OFF switch to the right to enable the direct access feature. The switch turns green when it's enabled.
- Now, you can enable the required accessibility options that you want to display in the direct access menu. There are 8 options available:
- Accessibility
- Voice assistant
- Universal switch
- Magnifier window
- Negative colors
- Grayscale
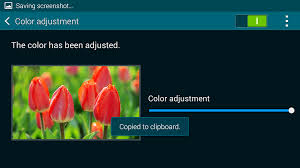
- Color adjustment. FYI, you have to set up the color adjustment feature first if you want to be able to enable this option.
- Interactive control. FYI, you have to enable the interactive control feature first if you want to be able to enable this option.
How to use the direct access feature?
As the example, if you'd like to enable the grayscale mode, you can easily do so by pressing the Home key three times quickly to open up the direct access menu and then tap Grayscale. The color of your phone's screen will be changed to grayscale.
How to Disable Assistant Menu Feature in Android 5.0.1 Lollipop
Assistant menu is a feature you can find in your Samsung Galaxy
S5. This feature is designed to assist those with dexterity issues or
those who want to easily navigate their phones using one hand by
providing quick access(the assistant menu icon) to a menu of important
functions. However, you can also easily turn this feature off if needed,
e.g: when you want to get rid the assistant menu icon from your screen,
when you no longer want to use this feature on your phone, etc.
How to disable the assistant menu feature?
You can do so by using some different methods: 1) From the assistant menu icon, 2) From the settings menu, 3) From the S Finder app, and 4) From the direct access menu.
Method #1: From the assistant menu icon
Utilizing the assistant menu icon is the fastest way to turn off the assistant menu feature. You can use the following steps to do so:
Method #2: From the Settings menu
You can use the following steps if you'd like to turn off the assistant menu feature from the general settings menu:
Method #3: From the S Finder app
You can use the following steps if you'd like to turn off the assistant menu feature from the S Finder app:
Method #4: From the direct access menu
If the direct access menu is enabled, you can use the following steps to turn off the assistant menu feature from the direct access menu:
How to disable the assistant menu feature?
You can do so by using some different methods: 1) From the assistant menu icon, 2) From the settings menu, 3) From the S Finder app, and 4) From the direct access menu.
Method #1: From the assistant menu icon
Utilizing the assistant menu icon is the fastest way to turn off the assistant menu feature. You can use the following steps to do so:
- On any screen, tap the assistant menu icon
 and then select Settings
  to quickly go to the settings menu for the assistant menu feature.
 - Slide the ON/OFF switch to the left to disable the assistant menu feature. The switch turns gray when it's disabled and the assistant menu icon will disappear from your screen.
Method #2: From the Settings menu
You can use the following steps if you'd like to turn off the assistant menu feature from the general settings menu:
- On any screen, swipe down the top of the screen to open up the notifications panel and then tap
 at the top right to go to the settings menu.
 - With the settings menu is displayed in grid view, scroll down to the Personalisation section and then tap Accessibility.
- Tap Dexterity and interaction.
- Tap Assistant menu.
- Slide the ON/OFF switch to the left to disable the assistant menu feature. The switch turns gray when it's disabled and the assistant menu icon will disappear from your screen.
Method #3: From the S Finder app
You can use the following steps if you'd like to turn off the assistant menu feature from the S Finder app:
- On any screen, swipe down the top of the screen to open up the notifications panel and then tap S Finder button.
- Type "assistant menu" in the search field and then tap
 at the virtual keyboard to start searching.
 - In the search result list, tap Assistant menu to go to the assistant menu feature.
- Slide the ON/OFF switch to the left to disable the assistant menu feature. The switch turns gray when this feature is disabled and the assistant menu icon will disappear from your screen.
Method #4: From the direct access menu
If the direct access menu is enabled, you can use the following steps to turn off the assistant menu feature from the direct access menu:
- On any screen, press the Home key three times to open up the direct access menu.
- Tap Accessibility.
- Tap Dexterity and interaction.
- Tap Assistant menu.
- Slide the ON/OFF switch to the left to disable the assistant menu feature. The switch turns gray when this feature is disabled and the assistant menu icon will disappear from your screen.
How to Enable and Use Assistant Plus Feature in the Stock Phone/Contacts App
One of the apps that is supported by the assistant plus feature is the
stock Phone/Contacts app. Thus, you can enable the assistant plus
feature for the Phone/Contacts app so that you can easily access to some
frequently used options or places in this app, e.g: edit contact,
delete contact, add or remove contact from favourites, view call logs,
view contacts list, etc.
How to enable the assistant plus feature for the stock Phone/Contacts app?
Assuming that you have enabled the assistant menu feature, you can easily turn on the assistant plus feature for the stock Phone/Contacts app by using the following steps:
When you have enabled the assistant plus feature for the stock Phone/Contacts app, you can use the following steps as the example of using this feature when you're using Phone/Contacts app:
I. While viewing your contacts list
How to enable the assistant plus feature for the stock Phone/Contacts app?
Assuming that you have enabled the assistant menu feature, you can easily turn on the assistant plus feature for the stock Phone/Contacts app by using the following steps:
- On any screen, tap the assistant menu icon

and then select Settings to quickly go to the settings menu for the assistant menu feature.
 - Tap Assistant plus.
- Slide the ON/OFF switch to the right to enable this option. The switch turns green when it's enabled.
- Check the box next to Phone/Contacts to enable this option.
- The assistant plus feature for the stock Phone/Contacts app has been enabled.
When you have enabled the assistant plus feature for the stock Phone/Contacts app, you can use the following steps as the example of using this feature when you're using Phone/Contacts app:
I. While viewing your contacts list
- Open Phone/Contacts app.
- Tap the Contacts tab.
- Tap the assistant menu icon and you'll be provided with these additional contextual menu options:
- Keypad
 : tap this option to open up the dial pad.
 - Logs
 : tap this option to go to the Logs tab and view all of your call histories.
 - Favourites
 : tap this option to go to the Favourites tab and view you favourite contacts list.
- Open Phone/Contacts app.
- Tap the Contacts tab.
- Tap the required contact to view its detail information.
- Tap the assistant menu icon and you'll be provided with these additional contextual menu options:
- Add to favourites
 : tap this option to add the selected contact to your favourite contacts list.
 - Remove from favourites
 : if the selected contact has been added to your favourite contacts
list, tap this option to remove the contact from the favourite contacts
list.
: if the selected contact has been added to your favourite contacts
list, tap this option to remove the contact from the favourite contacts
list. - Edit
 : tap this option to edit the selected contact.
 - Delete
 : tap this option to delete the selected contact.
- Open Phone/Contacts app.
- Tap the Favourites tab.
- Tap the assistant menu icon and you'll be provided with these additional contextual menu options:
- Keypad : tap this option to open up the dial pad.
- Logs : tap this option to go to the Logs tab and view all of your call histories.
- Contacts
 : tap this option to view your contacts list.
- Open Phone/Contacts app.
- Tap the Logs tab.
- Tap the assistant menu icon and you'll be provided with these additional contextual menu options:
- Keypad : tap this option to open up the dial pad.
- Favourites : tap this option to go to the Favourites tab and view you favourite contacts list.
- Contacts : tap this option to view your contacts list.
- Open Phone/Contacts app.
- Tap the Keypad tab.
- Tap the assistant menu icon and you'll be provided with these additional contextual menu options:
- Logs : tap this option to go to the Logs tab and view all of your call histories.
- Favourites : tap this option to go to the Favourites tab and view you favourite contacts list.
- Contacts : tap this option to view your contacts list.
Samsung Galaxy S5: How to Enable and Use Assistant Plus Feature in the Stock Messaging App in Android 5.0.1 Lollipop
Assistant menu is a feature in Samsung Galaxy S5 designed to assist
those with dexterity issues or those who want to easily navigate their
phones using one hand. This feature also has an option that will let you
display contextual menu options when you're using the stock Messaging
app so that you can easily access to some frequently used options or
features in this app, e.g: compose a new message, delete messages or
conversations, add recipients from your contacts list, etc.
How to enable the assistant plus feature for the stock Messaging app?
Assuming that the assistant menu feature is enabled, you can enable the assistant plus feature for the stock Messaging app by using the following steps:
- On any screen, tap the assistant menu icon
 and then select Settings
  to quickly go to the settings menu for the assistant menu feature.
 - Tap Assistant plus.
- Slide the ON/OFF switch to the right to enable this option. The switch turns green when it's enabled.
- Check the box next to Messages to enable this option.
- The assistant plus feature for the stock Messaging app has been enabled.
How to use the assistant plus feature in the stock Messaging app?
You can use the following steps as the example of using the assistant plus feature in the stock Messaging app:
- Open the stock Messaging app.
- While you're viewing the conversation list, tap the assistant menu icon and you'll be provided with these additional contextual menu options:
- Search
 : tap this option to search a specific message.
 - Compose
 : tap this option to create a new message, in other word, you can use this option to replace the compose button function.
 - Delete
 : tap this option to delete some or all conversations.
 - While you're viewing messages within a conversation, tap the assistant menu icon and you'll be provided with these additional contextual menu options:
- Call
 : tap this option to call the contact of the selected conversation.
 - Delete
 : tap this option to delete some or all messages within the selected conversation.
 - While you're composing a new message, tap the assistant menu icon and you'll be provided with this additional contextual menu option:
- Add from contacts
 : tap this option to add contacts from your contact list as the recipient.
How to Enable and Use Assistant Plus Feature in Internet Apps
If you often use the stock Internet app in your Samsung Galaxy S5 to browse webpages or search something online,
you can enable the assistant plus feature within the assistant menu so
that you can easily access to some frequently used options or features
available in the stock Internet app, e.g: enter URL, open a new page, close an opened page, etc.
How to enable the assistant plus feature for the stock Internet app?
When the assistant menu feature has been enabled, you can easily enable the assistant plus feature for the stock Internet app by using the following steps:
How to use the assistant plus feature for the stock Internet app?
You can use the following steps to use the assistant plus feature in the stock Internet app:
How to enable the assistant plus feature for the stock Internet app?
When the assistant menu feature has been enabled, you can easily enable the assistant plus feature for the stock Internet app by using the following steps:
- On any screen, tap the assistant menu icon
 and then tap Settings
  to quickly go to the settings menu for the assistant menu feature.
 - Tap Assistant plus.
- Slide the ON/OFF switch to the right to enable this option. The switch turns green when it's enabled.
- Check the box next to Internet to enable assistant plus for the stock Internet app.
- The assistant plus feature for the stock Internet app has been enabled.
How to use the assistant plus feature for the stock Internet app?
You can use the following steps to use the assistant plus feature in the stock Internet app:
- Open the stock Internet app.
- Tap the assistant menu icon .
- Aside from all default menus, you'll see these three additional contextual menu options within the assistant menu icon:
- Enter URL
 : tap this option to easily enter the webpage URL in the address bar.
 - Tab manager
 : tap this option to go to the tab manager when you want to open a new
page, switch between opened pages, close certain or all opened pages,
open a new incognito page, etc.
: tap this option to go to the tab manager when you want to open a new
page, switch between opened pages, close certain or all opened pages,
open a new incognito page, etc. - New tab
 : tap this option to easily open a new page or tab.
How to Enable and Use Assistant Plus Feature in Camera Apps

Within the assistant menu, there's a feature named assistant plus that
can be used in some default apps, one of which is the stock Camera app.
By enabling the assistant plus feature, you'll be given with some
additional contextual menu options within the assistant menu icon when
you're using the stock Camera app to let you easily access to a certain
frequently used option or feature in the stock Camera app.
How to enable the assistant plus feature for the stock Camera app?
Assuming that you have enabled the assistant menu feature, you can easily enable assistant plus feature for the stock Camera app by using the following steps:
How to use the assistant plus feature for the stock Camera app?
Once the assistant plus feature for the stock Camera app is enabled, you can use the following steps to use this feature in the stock Camera app:
How to enable the assistant plus feature for the stock Camera app?
Assuming that you have enabled the assistant menu feature, you can easily enable assistant plus feature for the stock Camera app by using the following steps:
- On any screen, tap the assistant menu icon
 and then tap Settings
  to quickly go to the settings menu for the assistant menu feature.
 - Tap Assistant plus.
- Slide the ON/OFF switch to the right to enable this option. The switch turns green when it's enabled.
- Check the box next to Camera to enable assistant plus for the stock Camera app.
- The assistant plus feature for the stock Camera app has been enabled.
How to use the assistant plus feature for the stock Camera app?
Once the assistant plus feature for the stock Camera app is enabled, you can use the following steps to use this feature in the stock Camera app:
- Open the stock Camera app.
- Tap the assistant menu icon .
- Aside from all default menus, you'll see these two additional contextual menu options within the assistant menu icon:
- Switch camera
 : tap this option to easily switch between the rear and the front-facing camera.
 - Gallery
 : tap this option to quickly open up the latest picture taken with the stock Camera app in the Gallery app.
How to Enable and Configure Assistant Menu in Android 5.0.1 Lollipop
Basically, the assistant menu feature can be found in Android 4.4.2 Kitkat. But, you can still find this feature when you have updated your Samsung Galaxy S5 to Android
5.0.1 Lollipop. Just to remind us, assistant menu is a feature designed
to assist those with dexterity issues or those who want to easily
navigate their phones using one hand by simplifying access to certain
frequently used features or actions using the assistant menu icon. The
icon will stay on top so that the users can easily access it.
How to enable the assistant menu feature?
You can turn on this feature by using three different methods: from the settings menu, from the S Finder and from the direct access menu.
Method #1: From the settings menu
You can enable assistant menu from the general settings menu by using the following steps:

Method #2: From the S Finder
You can utilize the S Finder app to quickly go to the assistant menu feature and then enable it by using the following steps:
Method #3: From the direct access menu
If you have enabled the direct access, you can quickly go to the assistant menu feature and then enable it from the direct access menu by using the following steps:

How to configure the assistant menu feature?
Assuming that this feature is enabled, there are some options within this feature that can be customized according to your need:
How to enable the assistant menu feature?
You can turn on this feature by using three different methods: from the settings menu, from the S Finder and from the direct access menu.
Method #1: From the settings menu
You can enable assistant menu from the general settings menu by using the following steps:
- On any screen, swipe down the top of the screen to open up the notifications panel and then tap
 at the top right to go to the settings menu.
 - With the settings menu is displayed in grid view, scroll down to the Personalisation section and then tap Accessibility
 .
. - Tap Dexterity and interaction.
- Tap Assistant menu.
- Slide the ON/OFF switch to the right to enable this feature. The
switch turns green when this feature is enabled and the assistant menu
icon
 will be displayed on your screen.
Method #2: From the S Finder
You can utilize the S Finder app to quickly go to the assistant menu feature and then enable it by using the following steps:
- On any screen, swipe down the top of the screen to open up the notifications panel and then tap S Finder button.
- Type "assistant menu" in the search field and then tap
 at the virtual keyboard to start searching.
 - In the search result list, tap Assistant menu to quickly go to the assistant menu feature.
- Slide the ON/OFF switch to the right to enable this feature. The
switch turns green when this feature is enabled and the assistant menu
icon will be displayed on your screen.
Method #3: From the direct access menu
If you have enabled the direct access, you can quickly go to the assistant menu feature and then enable it from the direct access menu by using the following steps:
- On any screen, press the Home key three times to open up the direct access menu.
- Tap Accessibility.
- Tap Dexterity and interaction.
- Tap Assistant menu.
- Slide the ON/OFF switch to the right to enable this feature. The
switch turns green when this feature is enabled and the assistant menu
icon will be displayed on your screen.
How to configure the assistant menu feature?
Assuming that this feature is enabled, there are some options within this feature that can be customized according to your need:
- Change the assistant menu icon position:
- Tap the assistant menu icon and then tap Settings
 .
. - Tap Dominant hand and then select Right if you'd like to place the icon on the right side of the screen, or select Left if you'd like to place the icon on the left side of the screen.
- The icon will be displayed in the selected position.
- Customize menus within the assistant menu icon:
- Tap the assistant menu icon and then tap Settings .
- Tap Edit.
- To remove the existing menu from the assistant menu icon, tap
 at the required menu you want to remove.
 - To add the available menu to the assistant menu icon, tap
 at the required menu you want to add.
 - To reorder menus within the assistant menu icon, drag and drop the menu to the desired position.
- To reset the menus within the assistant menu icon back to the default, tap
 at the top right and then select Reset. Tap Reset button to confirm.
 - Enable the assistant plus feature:
You can enable this option so that your phone will display contextual menu options for the selected applications by using these steps: - Tap the assistant menu icon and then tap Settings.
- Tap Assistant plus.
- Slide the ON/OFF switch to the right to enable this menu. The switch turns green when it's enabled.
- Select the required apps that you want to display its contextual menu options in the assistant menu icon. There are 7 apps available: Camera, Email, Gallery, Internet, Messages, Phone/Contacts and Settings.
- If you have selected an app(e.g: Internet app), when you open this app, you'll see some contextual menu options are displayed in the assistant menu icon, e.g: Enter URL, Tab manager and New Tab.
- Change the touch pad size:
- Tap the assistant menu icon and then tap Settings .
- Tap Touchpad size and then select Small, Medium or Large.
- From now on, the touchpad will be displayed with the selected size when you're using the cursor tool in the assistant menu.
- Change the cursor size:
- Tap the assistant menu icon and then tap Settings .
- Tap Cursor size and then select Medium or Large.
- From now on, the cursor will be displayed with the selected size when you're using the cursor tool in the assistant menu.
- Change the cursor speed:
- Tap the assistant menu icon and then tap Settings .
- Tap Cursor speed and then select Slow, Normal or Fast.
- From now on, the cursor will use the selected speed when you're using the cursor tool in the assistant menu.
How to Adjust Tap and Hold Delay in Android 4.4.2 Kitkat
When you use your Samsung Galaxy S5, it sometimes requires you to tap
and hold the screen to open up contextual menus or trigger another
actions. By default, this phone sets the duration of long press to a
short delay or 0.5 seconds. This short delay sometimes brings difficulty
for some users especially for those who have motor difficulties since
it will be hard for them to differentiate between a quick and long
press. Luckily, Samsung Galaxy S5 has an accessibility feature named tap
and hold delay which will let you adjust the recognition time for long
press so that you can control or set how long the device should delay
before opening contextual menus or trigger another actions.
How to adjust the tap and hold delay?
You can do so by using the following steps:
How to adjust the tap and hold delay?
You can do so by using the following steps:
- On any screen, swipe down the top of the screen to open up the notification panel and then tap
 to go to the settings menu.
 - With the settings menu is displayed in grid view, scroll down to the Personalisation section and then tap Accessibility
 .
. - Tap Dexterity and interaction.
- Tap Tap and hold delay and then select from the following options:
- Short (0.5 seconds)
- Medium (1.0 second)
- Long (1.5 seconds)
- Custom: choose this option if you want to set your own tap and hold delay. You just need to tap and hold your finger within the provided box and then release after the desired length of time. Once done, tap Save button to save your customized tap and hold delay.
- The tap and hold delay has been adjusted.
How to Enable and Use Interaction Control
Interaction control is a feature available in Samsung Galaxy S5 which
will allow you to block or restrict certain or whole area of the screen
while using an app so that the touch interaction can only work in the
unblocked area. While this feature is being used in an app, all physical
buttons function, the auto rotate feature, the touch interaction in the
notification panel and all enabled motions will be disabled. Given the
function, you can use the interaction control mode if you want another
users who will use your phone only have a limited access and control of
your media or data.
How to enable or disable the interaction control feature?
You can turn on or off this feature by using the following steps:


How to use the interaction control feature?
Assuming that you have enabled the interaction control feature, then you can use this feature to control the touch interaction while using an app. As the example, we'll use this feature while viewing photos within an album in Gallery app:
As a note, since the interaction control feature will disabled the physical buttons function then it can't be enabled along with the assistant menu feature, in other words, the assistant menu feature should be disabled first when you want to use the interaction control feature.
How to enable or disable the interaction control feature?
You can turn on or off this feature by using the following steps:
- On any screen, swipe down the top of the screen to open up the notification panel and then tap
 to go to the settings menu.
 - With the settings menu is displayed in grid view, scroll down to the Personalisation section and then tap Accessibility
 .
. - Tap Dexterity and interaction.
- Tap Interaction control.
- Depending on your current settings, tap the ON/OFF switch to enable or disable the interaction control feature. When the switch is on the right side or shows green means the interaction control feature is enabled.
How to use the interaction control feature?
Assuming that you have enabled the interaction control feature, then you can use this feature to control the touch interaction while using an app. As the example, we'll use this feature while viewing photos within an album in Gallery app:
- Open Gallery app.
- Tap an album.
- Tap a photo within the album to view it in full screen.
- To go to the screen where you can outline the area you want to block or restrict from touch interaction, there are two ways available that can be used:
- Press the Home key and the Volume down key simultaneously.
- Press the Home key three times quickly and then select Interaction control. It will work if you have enabled the interaction control option within the direct access feature.
- Adjust the restricted area:
- If you want to block certain area of the screen, you can do so either by adjusting the blue frame or drawing a line around the required area that you want to restrict from touch interaction.
- If you want to block the whole area of the screen, you can do so by checking the box in the left side of the Block whole screen option.
- Tap Done button.
- Your phone will display the blue frame as a sign that the area is restricted. If you didn't restrict the whole screen, you still can do touch interaction in the not restricted area.
- To exit from this mode, there are two ways available that can be used:
- Press the Home key and the Volume down key simultaneously.
- Press the Home key three times quickly. It will work if you have enabled the interaction control option within the direct access feature.
As a note, since the interaction control feature will disabled the physical buttons function then it can't be enabled along with the assistant menu feature, in other words, the assistant menu feature should be disabled first when you want to use the interaction control feature.
Enabling and Use Air Wake Up in Samsung Galaxy S5

Samsung Galaxy S5 has some air gesture features which will allow you
control your phone or do certain function by waving your hand above the
proximity and gesture sensors located at the top side of the phone. One
of the air gesture features available in this phone is the air wake up
feature. When this feature is enabled, you can easily wake up your phone
after the screen has turned off without you have to press any physical
button since you can do so simply by waving your hand above the sensors.
How to enable or disable the air wake up feature?
You can turn on or off the air wake up feature by using two different
methods: from the general settings menu and from the direct access
option.
Method #1: From the settings menu
You can do so by using the following steps:
- On any screen, swipe down the top of the screen to open up the notification panel and then tap
 to go to the settings menu.
 - With the settings menu is displayed in grid view, scroll down to the Personalisation section and then tap Accessibility
 .
. - Tap Dexterity and interaction.
- Tap Air wake up.
- Depending on your current settings, tap the ON/OFF switch to enable or disable the air wake up feature. When the ON/OFF switch is on the right side or turns green means the air wake up feature is enabled.

Method #2: From the direct access option
You
can use this method if you have enabled the accessibility menu within
the direct access feature. See the following steps to enable or disable
the air wake up feature from the direct access option:
- On any screen, press the Home key three times quickly.
- Tap Accessibility.
- Tap Dexterity and interaction.
- Tap Air wake up.
- Depending on your current settings, tap the ON/OFF switch to enable or disable the air wake up feature. When the ON/OFF switch is on the right side or turns green means the air wake up feature is enabled.
How to use the air wake up feature?
Assuming that you have enabled the air wake up feature, then you can use
this feature to turn the screen back on without pressing the Home key
or Power key. See the following steps as the example:
- When the screen has turned off, put your phone on a flat or stable surface, or you can hold your phone securely so that it won't move.
- Move your hand back and forth over the sensors(it's located above the screen in the right side of the earpiece). FYI, make sure to make a smooth and steady movement up to three inches above the sensors so that the sensors can easily recognize your gesture.
- The screen will be turn back on.
Fixing Screen Colour Looks Like a Negative Film in Samsung Galaxy S5

If your screen colour is inverted or looks like a negative film, don't
be panic first since it doesn't always mean that the screen is broken.
It may happen if you have accidentally turned on the negative colours
feature which will inverse the screen display to the negative colour and
display the on-screen text white on black. So, if you're experiencing
this issue, you can fix it and get back a normal screen colour by
disabling the negative colours feature in your phone.
How to disable the negative colours feature?
If you like to reverse the screen colour back to the default, then you have to disable the negative colours feature in your phone. You can do so by using two different methods: from the general settings menu and from the direct access option.
Method #1: From the settings menu
You can disable the negative colours feature from the general settings menu by using the following steps:
Method #2: From the direct access option
If you have enabled the negative colours option within the direct access feature, then you can use the following steps to disable the negative colours feature:
How to disable the negative colours feature?
If you like to reverse the screen colour back to the default, then you have to disable the negative colours feature in your phone. You can do so by using two different methods: from the general settings menu and from the direct access option.
Method #1: From the settings menu
You can disable the negative colours feature from the general settings menu by using the following steps:
- On any screen, swipe down the top of the screen to open up the notification panel and then tap
 to go to the settings menu.
 - With the settings menu is displayed in grid view, scroll down to the Personalisation section and then tap Accessibility
 .
. - Tap Vision.
- Scroll the screen to the bottom and then clear the checkbox next to Negative colours to disable this option.
- The screen colour will be reversed back to the default and the text will be displayed black on white.
Method #2: From the direct access option
If you have enabled the negative colours option within the direct access feature, then you can use the following steps to disable the negative colours feature:
- On any screen, press the Home key three times quickly.
- Tap Negative colours to disable this option.
- The screen colour will be reversed back to the default and the text will be displayed black on white.
Enabling Mono Audio in Samsung Galaxy S5
Mono audio is a feature available in Samsung Galaxy
S5 that will allow you to set the device to switch the sound output
from stereo to mono when you connect your earphones into your phone. You
can use this feature when you have a hearing impairment that makes you
can only hear well with your left or right ear or when you're in a
situation where using a single earphone is more convenient.
How to enable mono audio?
You can switch the audio from stereo to mono for listening with a single
earphone by using two different methods: from the general settings menu
and from the direct access option.
Method #1: From the settings menu
- On any screen, swipe down the top of the screen to open up the notification panel and then tap
 to go to the settings menu.
 - With the settings menu is displayed in grid view, scroll down to the Personalisation section and then tap Accessibility
 .
. - Tap Hearing.
- Check the box next to Mono audio to enable this option.
- Mono audio for listening with a single earphone has been enabled.
Method #2: From the direct access option
This
method can be used if you have enabled the accessibility menu within
the direct access feature. You can use the following steps to switch
audio from stereo to mono from the direct access option:
- On any screen, press the Home key three times quickly.
- Tap Accessibility.
- Tap Hearing.
- Check the box next to Mono audio to enable this option.
- Mono audio for listening with a single earphone has been enabled.


Samsung Galaxy S6 Edge: Supporting And Use Magnifier Window Feature ~ Inside Samsung >>>>> Download Now
ReplyDelete>>>>> Download Full
Samsung Galaxy S6 Edge: Supporting And Use Magnifier Window Feature ~ Inside Samsung >>>>> Download LINK
>>>>> Download Now
Samsung Galaxy S6 Edge: Supporting And Use Magnifier Window Feature ~ Inside Samsung >>>>> Download Full
>>>>> Download LINK